Functionality : 7 Ways To improve the Functionality of Your Garden
DAY 8 : Desire Lines – Go with the flow
When you are out and about you in your garden, you may notice yourself wearing a beaten track across the lawn or through certain garden beds. These are the routes that we prefer to take, usually because they offer the most direct way to get from A-B.
Designers refer to these as ‘desire lines’ and making these routes permanent is a great start in improving the functionality of your garden. Instead of a worn makeshift path, create proper paths on these routes. These can formal, continuous paths or very casual, such as pavers laid through the lawn or garden. Lay paving stones between 650 – 750mm apart, centre to centre. This is a comfortable step for most people. If you plan to plant between, to stop debris trapping on the pavers, just set them a little above garden level.
To avoid a hotch-potch effect use a material that’s used elsewhere in the garden or on the house, such as a brick or stone, which will tie the path aesthetically to the home.
So in short: Take note of your favoured routes through your garden and turn these into permanent paths using a durable material. For a cohesive look, choose a material that is already in use on your property.
DAY 9 : The Kitchen Garden - Practical design tips
The lead up to lockdown saw a big surge in the sale of edible plants., however productive gardening is a trend that has been on the rise for a while now and looks set to hang around. Green thumbs and horticultural prowess aside, from a design perspective there are a couple of practical things that can make all the difference as you invest time and effort in your vegetable gardening efforts.
Position it as close to the house as you can, especially if you are growing herbs and a few seasonal veges. If you have to walk miles across a wet lawn to get a handful of parsley for your scrambled eggs, you may not bother! If you plan large scale cropping, then consider having two productive areas. A small herb or beautiful kitchen garden close to the house and a larger, messier patch elsewhere for things you only harvest occasionally.
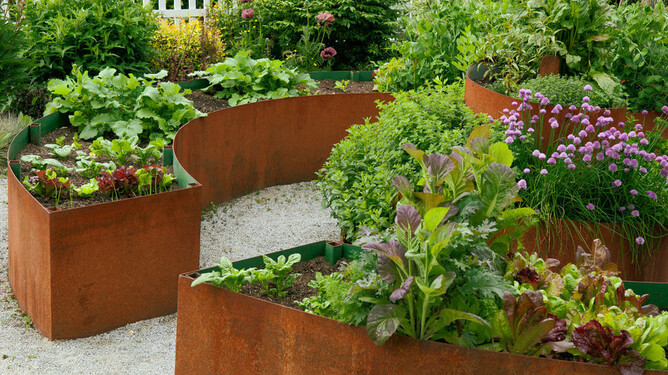
Make it look beautiful: The closer to the house it is, the more attractive it needs to be. Because you don’t want to waste time or money, I also suggest, especially to those new to edible gardening, creating the visible kitchen garden in a manner that it can easily be repurposed to ornamental beds if you decide vegetable gardening is not for you after all (it happens!). So, build or buy nice raised planters or pots and arrange them in an attractive layout. Include decorative elements such as attractive obelisks for supporting climbing crops and tuck in a few flowering plants.
Include a nook for seating if you can or at least make the beds seating height so you can perch on the edge.
Have practical surfaces or paths. Grass or pebbles will be impractical and a garden maintenance nightmare. Consider practical surfaces such as pavers with low growing herbs between, or a fine bark mulch for paths.
So in short : A vegetable garden that is both beautiful and practical, with seating, paths and decorative qualities, can become an integrated extension of your outdoor living space but one which can easily repurposed to ornamental garden space if you decide productive gardening is not for you.
DAY 10 : Trampoline Tricks - of the camouflage kind
If you have kids, there’s a high possibility that your garden also has to accommodate a trampoline. These eyesores (sorry trampoline designers, I know you try) tend to take up permanent residence on the lawn... for years! If you are over dragging it to a new spot each time the lawn needs mowing, there is a better way to include a trampoline in your garden (without creating a trampoline pit).
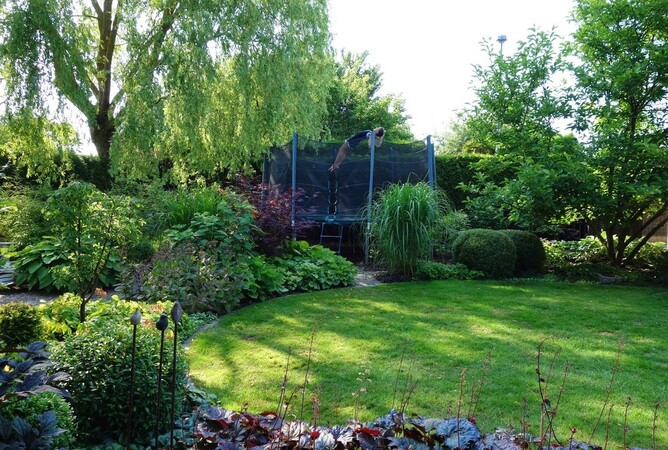
Integrate it into the planting and your trampoline can virtually disappear, as well as become a bit more exciting for the children to use. Just chose a flat area away from overhead trees or structures. Lay an easy-care ground surface such as bark or pebble below where you will place the trampoline. I have even created gorgeous shade gardens below trampolines using ground hugging, low maintenance plants such as Ajuga reptans and small ferns. Plant evergreen shrubs or perennials (around 700mm high) to the front and then flank the sides with taller shrubs. A backdrop of foliage, such as a hedge will help complete the disappearing act of the netted cage.
Consider also that when the trampoline eventually loses its appeal, once removed you have the perfect spot to place that hot tub you always wanted!
So in short: Get creative with placement and planting and you can camouflage that trampoline so it disappears into the garden and gain back an open lawn space that is more functional and easier to mow. Then, when you are done with the tramp, switch it out for a hot tub nestled into your little garden nook.
DAY 11 : Clutter Free - Casual seating in the garden
The most functional garden of all is one that meets your needs. However, today’s life-styles mean our needs are often complex and with section sizes shrinking for most, our gardens have to work very hard to accommodate all that we ask of them. Working flexible elements into your landscape is a clever way around this.
One of my favourite garden design tricks is creating beautiful garden feature walls at seating height. That’s around 450-500mm high, but it can be pushed to 600mm. As well as being functional, such as when providing retaining or garden terracing or simply dividing up the garden areas, these low walls also provide casual seating ledges throughout the garden or on the patio edge without making the mistake of cluttering up your garden spaces with chairs.
Give your wall a gracious serpentine curve, break it into sections or even make it taper in height, and you also create a fun play element for the kids. Large, smooth rocks used for garden retaining or placed on a lawn or garden edge can serve a similar purpose and work especially well in informal garden spaces, such as pebbled patios or firepit areas.
So in short: Strategically placed walls and large rocks at a suitable height can provide casual places to perch or play, helping maximise space in the small garden.
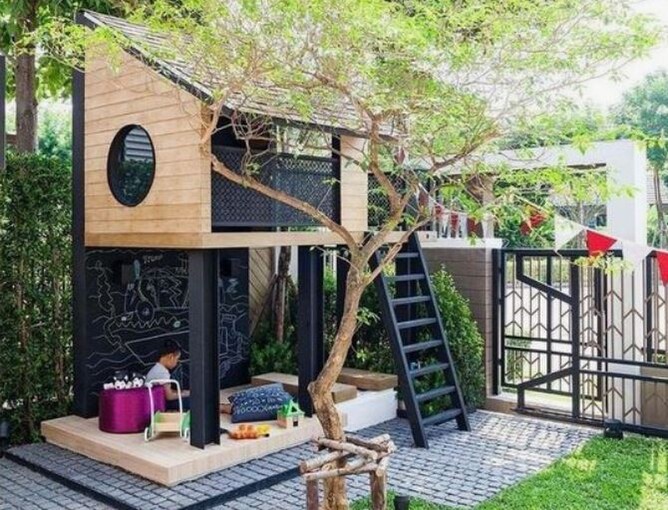
DAY 12 : Kids in the garden - outdoor play zones
As lockdown continues and the beaches have been officially closed for swimming, the kids in my neighbourhood are definitely getting noisier as they head to the garden for entertainment. In even the smallest of gardens creating different themed garden zones can really improve the functionality of your garden and help to make the space feel bigger.
Creating a ‘kids zone’ can prevent the common garden mistake of having kids play equipment (which isn’t always the most attractive), spread across the garden making it resemble a day-care centre rather than the tranquil garden sanctuary you may have envisaged. If you can get it off the lawn so you don’t have to mow around it then even better!
Moving play equipment out of or away from your outdoor living and entertaining spaces removes the clutter and creates a more relaxing zone for adult or quiet time, meaning the whole family can enjoy the garden in different ways while taking a break from the indoors. Include seating in your play zone if you have space, so there are comfy places to sit there as well…maybe use some of those old tins of paint to zhuzh up a tired old bench or seat and add a fun pop of colour.
If your garden is small, then naturalised play elements or clever camouflage of play equipment (see our previous two posts) are a good way to avoid the playcentre look. Grassy slopes and mounds are also fun additions that look good and save money by reducing the need for expensive retaining if your site is not flat. Blackboard walls fixed to fences make good use of vertical space and if you have a big tree, a swing always looks pretty as well as providing hours of entertainment.
So in short : Create a dedicated ‘kids zone’ to de-clutter your outdoor space and you not only prevent your garden resembling a day-care centre, you get to enjoy the tranquility of a quieter, adult friendly outdoor living area.
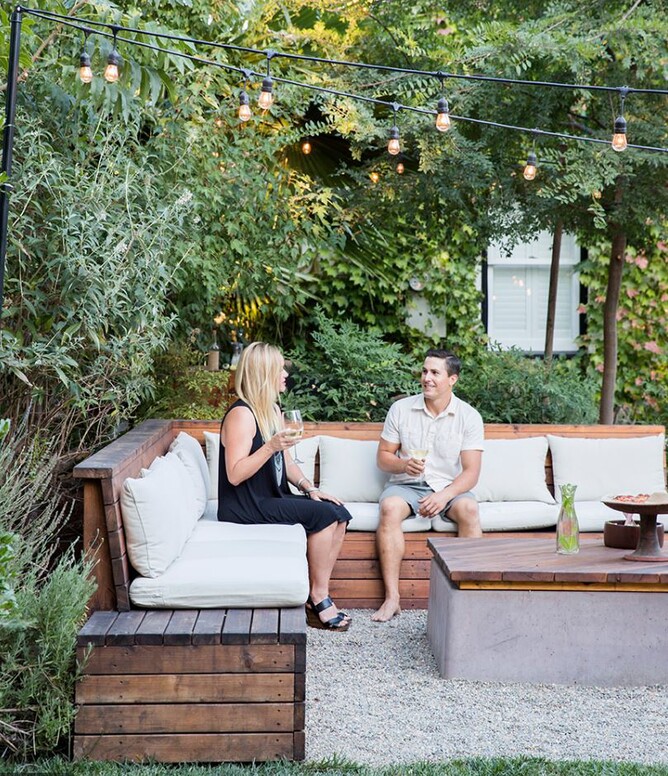
DAY 13 : Making your outdoor seating area more relaxing & inviting
Most gardens have some sort of outdoor living space close to the house, be it a deck or a patio. These are hardworking spaces that, in most cases, connect well to our homes and that have that easy indoor - outdoor flow we are so keen on. If we are lucky, we may even have another outdoor seating spot as well, such as a bench or similar elsewhere in the garden. So with these seating areas in-situ, why are some inviting and nice to sit in, and others, not so much. Often, it’s because a very simple design rule has been overlooked and it is very easy to fix.
It’s about static space versus motive space! Motive spaces are spaces we move through. Those which experience ‘traffic’...kids, dogs etc. If we place our furniture in these pedestrian traffic zones, they just don’t feel restful. The static spots are where you want to sit! These spaces are tucked off the main routes, such as in the corner of your patio or deck. Move your furniture out of the traffic zone and into a restful corner and I guarantee you, you will instantly change the vibe of your seating space.
So, what makes a static space? Generally, backdrops or barriers. A seating area that offers a physical barrier of some sort behind you will always feel more secure than one that doesn’t. Let’s face it, it’s not easy to relax if you are looking over your shoulder to see if someone is creeping up on you! Create static corners or nooks in your garden using existing buildings, fences and walls; or add new backdrops using screens, garden beds...even pots and planters work. Then, sit back and relax.
So in short : To make your outdoor seating areas more relaxing and inviting, move them out garden traffic routes or wide open areas and nestle them into corners or nooks created with planting or other solid backdrops.

DAY 14 : Washing day blues…..
For some, the sight of washing billowing in the breeze is a joy but to others, having your smalls on full garden display doesn’t set quite the tone they are looking for.
Regardless of which sunny spot you choose to place your clothesline in, treating it as an after thought is one of the most common mistakes people make in planning their garden layout. With a little forward panning and a bit of creativity, a clothesline can be really functional and still add to the aesthetics.
- Place it close conveniently to the house and conceal it behind a decorative screen. A screen at the side of your deck, with a clothesline mounted to the boundary side of it works a treat.
- Place it further away from the house and simply work a nice path into your garden layout, such as steppers through lawn or a path through planting., so you can enjoy the journey. Again, consider placing it behind a feature screen. A colourful free-standing wall or hedge also works.
- Look beyond the standard fold down or rotary models available for sleek, contemporary clotheslines that take up less of your valuable garden space.
- You can even build your own clothesline using colourful poles, on-end timber posts or other sculptural elements that will add interest to your garden.
- Clotheslines and productive gardens have a nice synergy, however even in straight service courts, a little low planting at the base of your clothesline won’t affect drying and makes the area a lot nicer to look at.
So in short: Consider your clothesline as part of your garden rather than an afterthought and use decorative elements to help integrate it into the garden design in a manner that is both attractive and functional.