'7 Tops Tips' To Tidy Up Your Garden
DAY 1: Before you prune those shrubs...
This is likely to be one of the first key garden mistakes made when you dust off the garden tools and embark excitedly on your garden clean up. While a great start to tidying up your garden, hard pruning flowering shrubs at the wrong time of year can cheat you of a seasons flowering. Do your research first, but the general rule of thumb is: Shrubs that flower in autumn or in late summer (aka shrubs that flower on new wood) should be pruned in early spring before new growth emerges. Shrubs that flower on old wood (spring or early summer bloomers) should be left until after flowering before getting their big haircut.
So in short : Because spring-flowering shrubs bloom on wood that grew the previous year, these are the ones that should not be pruned yet. Other than that, Happy Pruning!
DAY 2: Get on top of your weeds
“One year's seeding, makes seven years weeding.” Wise words issued to me by my mother-in-law many moons ago and never forgotten!
If your weed problem is widespread, buy yourself some time. Remove the flower and/or seed heads from your weed species first, especially off those grasses poking their heads under the fence from next door. That’s going to slow down the long-term spread.
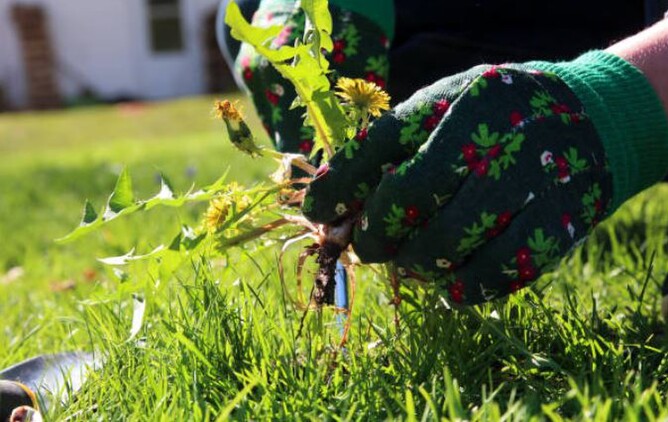
Next, don’t just pull their little green heads off. You need to dig out all the roots as well, otherwise the tenacious little devils will go deep, making the weed even more robust and harder to remove when it re-sprouts (which it will!). If digging is not your thing, seed heads removed, you could weed spray and wait for the plants to die off. For small areas, boiling water is a very fast and effective organic weed killer.
So in short : Weeds and roots left in the soil will generate either more or tougher weeds. Remove or kill the whole plant for best long term weed mitigation.
DAY 3 : What to remove during your garden clean up - Strategic plant removal for aesthetics
On a regular basis I see gardens that have been scalped of all mature planting. It can take years for trees and shrubs to attain stature and some treasures are likely hiding within your urban jungle which just need space to shine and attain their full potential. Removing just troublesome plants can have huge impact and significantly improve your garden aesthetic. It may even save you money (and grief) in the long term. Before you get the chainsaw out, consider the list below to determine what to remove during your garden clean up.
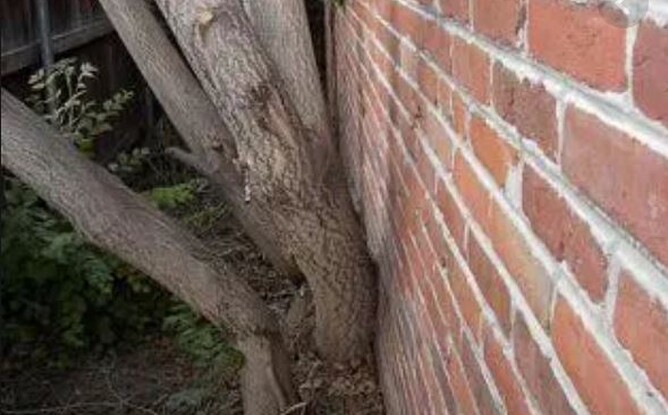
- Which trees and shrubs might do damage long term. Ie Yucca’s have very vigorous roots systems which can push over fences and damage retaining walls long term. Trees planted very close to fences or structures (such as your house) are also potential problems.
- Anything dead, dying, past its best or beyond help adds no beauty to your garden. Unsure if it’s actually dead? Discreetly cut off a slim branch or shoot, if it’s green inside it’s still alive!
- Identify specimens poorly planted by nature (aka ‘bird spread’) these generally have bad form and may be crowding out more desirable specimens. Bushy cherry trees are a common example.
- Weed species such as privet (which triggers allergies) are common garden intruders.
- If you are looking for a low maintenance garden, then put 'garden thugs' on your hit list too. These are the vigorous plants that you are constantly battling to keep under control.
- Lastly, if you find particular plants ugly or they just don’t fit your desired aesthetic, can they be gifted to others and re-homed? Check what will be revealed upon removal though, possibly that shrub is nicer to look at than your neighbour’s garage
*Before pruning or felling be sure and check specimens are not protected under any covenant or local authority rule.
So in short: To improve the aesthetics of your garden, strategic removal of undesirable specimens may reveal hidden treasures with maturity that can’t be bought at the garden centre. It can also save you time, money and grief in the long term by nipping future problems in the bud.
DAY 4 : Plants for free - without leaving your property
If your weeding is done and you’ve removed all the unwanted residents from your garden as part of your garden makeover project, the borders might be looking a little bare right now. With garden centres sadly locked up for lockdown, fortunately you can look to nature to provide. For free!!
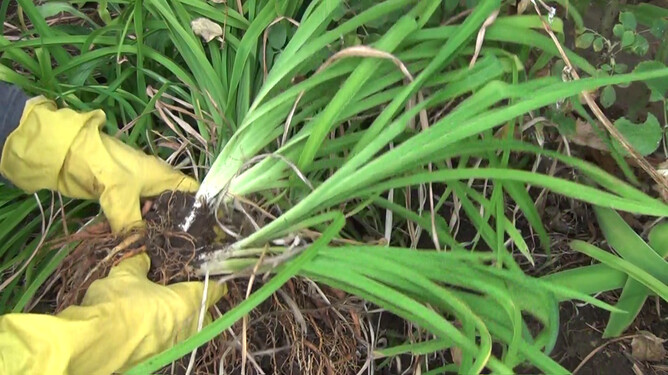
Perennial plants (those that typically die down over winter) are at their best when they are young and have plenty of room to spread. A common garden mistake is letting perennials get tired or crowded. We can rejuvenate old, tired perennial plants by occasionally splitting or dividing them. Autumn is a great time to do this as the plants have time to get settled back, ready to take off again in spring. These divisions are great for filling up those gaps and, if planted in large easy to maintain groups, will have a lot more visual impact than the one original plant did.
Ground covers are another good source of free plants, as often these travel by ‘runners’ which take root as they go. These may have spread naturally over the summer months and patches or small plants can be easily dug up and replanted elsewhere.
Now is also a good time to take stock of what plants have self- seeded that may be transplanted to better positions. Check around this year’s annuals for self-propagated seedlings. Some annuals can also be 'perennialised', for a year or two at least. If it still looks healthy give it a trim back and see what happens!
So in short : Many plants will self-seed or can be divided up, quickly creating new vigorous plants that won’t cost you a cent.
DAY 5 : Support your climbing plants...or not!
If you’ve been giving the garden a good tidy up during lockdown, it might have come to light that your climbing plants aren’t hiding those unattractive fences as well as you would like. A common garden mistake is failing to provide the right support.
Climbers roughly fall into three categories – self clinging, wall shrubs and twiners. Self- clingers, as you would expect, are able to self-support. They use ‘suckers’ to attach their tendrils and pull themselves up a wall or structure. Ivy, Boston Ivy, Virginia creeper and Climbing fig are all good examples. Choose an evergreen species and that ugly old fence or wall will soon disappear beneath a wall of green.
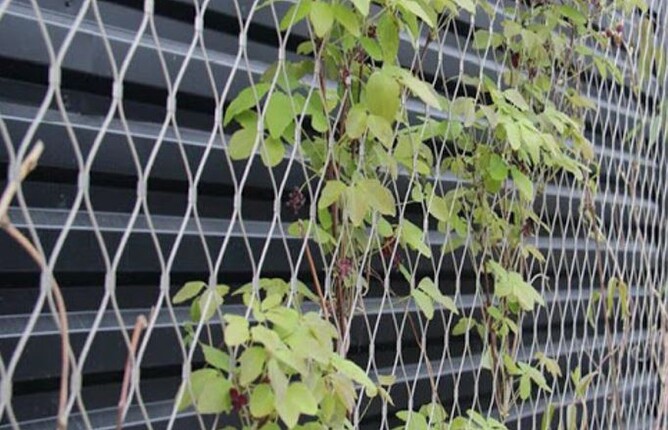
But the twiners need your help. The very popular ‘Star Jasmine’ (not actually a jasmine at all) is one most are familiar with these days. Twiners need something to wrap their little tendrils around, in order to gain traction. Left to their own devices they will either form an untidy mound at the base of the fence you are trying to cover, or the tiny new shoots will find their own support, such as through the gaps in your fence and wrapping around the fence palings. This is all well and good, until these innocent little shoots turn into a large robust stem structure that damages your expensive fence by pushing apart the palings. Avoid this. Give it something to climb up.
The right kind of support depends on what you are trying to achieve. Wires (tensioned is best) provide a good framework for pruning back to. Great if you are training to a pattern, need to hard prune every year, or just want to be able to maintain the underlying surface. If you are after full cover, then trellis or mesh is the way to go. Using multiple runs of wires also works. Your climber is then supported across a broad area, independent of the fence structure. It can even be clipped to form a hedge like structure, sometimes called a ‘fedge’. Wall shrubs (such as Pyracantha fall in between. They don’t naturally climb, just lean against the wall, generally self-supporting over time. These need formulative pruning & training in order to attain the desired shape and an underlying wire support is still a good idea.
So in short : Don’t expect your climbers to climb or perform well without the right type of support structure for what you are trying to achieve.
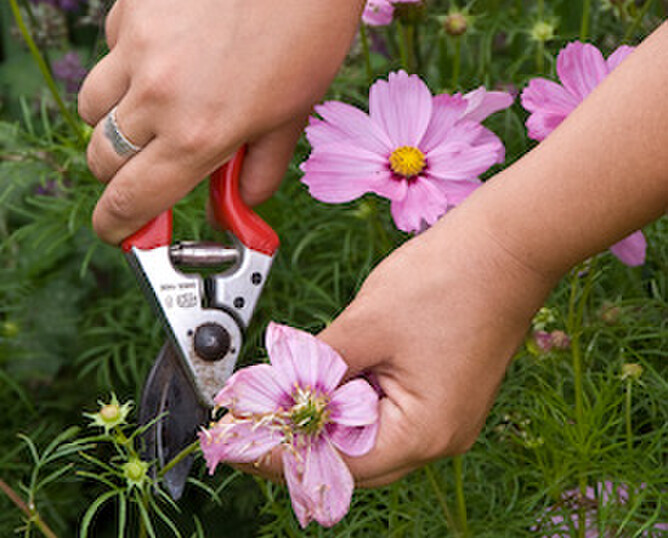
DAY 6 : Deadheading - Keep things interesting
The goal of annual pants is to flower, set seed, and die, so it is good practice to deadhead annuals and perennials too. By removing old flower heads you send the plant a message produce more flowers. Deadheading also encourages plants foliage and roots growth, rather than seed production.
With autumn upon us it’s a great time to deadhead, however getting carried away can be a mistake as many plants produce gorgeous ornamental seed heads and berries at this time. These can provide visual interest and food sources for birds over the dreary winter months.
So in short : A quick snip will keep your plants flowering over a longer period but know when to stop so you don't miss out on interesting and bird attracting seed heads and berries.
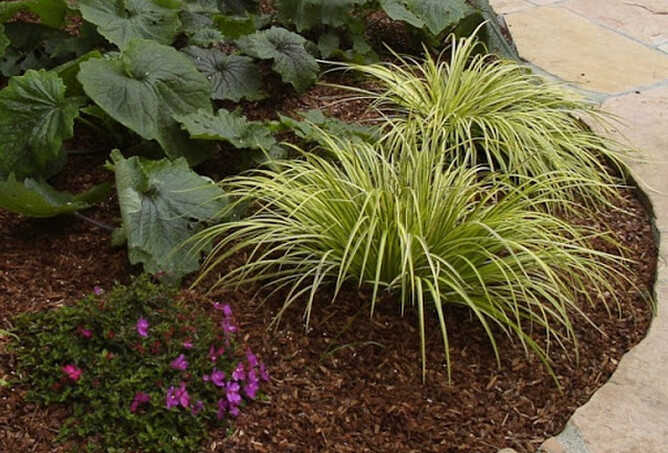
DAY 7: Marvelous Mulch
If your weeding is done, a 10cm thick topping of mulch will help keep pesky weeds at bay. It will also improve the look of your garden. But there are important things to know:
Mulch doesn’t kill all weeds. It does however cause fast spindly growth. Smothered weeds will shoot up to reach the light, rather than putting down roots, making those that reach the surface much easier to remove.
Mulch prevents the soil from drying out encouraging plants to put their roots down deeply, so you don't need to water as often. But make sure you water well first or mulch after rain, so you're not locking dry soil in.
Unless you are using a good quality compost mulch which will also enrich the soil, be sure and use an application of blood and bone over the garden before laying your mulch. Especially if you are using bark or mulching on a budget with materials such as shredded cardboard, newspaper or even old carpet.
Lastly. Take care that your mulch doesn't smother small plants or touch any stems, including trunks of shrubs and trees as this can burn or soften the stems, making your plants vulnerable to disease.
So in short: Water well first, make sure it will enrich the soil and not rob it of nutrients and be sure your mulch is not touching your plants when you are done