Photos for your landscape designer
It’s natural to want our photographs to portray things in their best light. When taking informative photos for your online landscape designer it’s a little different, because they want to see the good, the bad and the ugly! Around 20-25 photographs will usually encapsulate all the important information.
Photographs roughly fall into 4 categories:
- Overview
- Contextual
- Detail
- Botanical
Overview shots
Let’s talk about Overview shots first. These are used to help establish the spatial qualities inside of your site. They also give designers a feel for the style of your home, how it sits on your property and how the various garden areas fit together.
Key overview shots to include:
- Your house front door / pedestrian approach
- Back yard
- Front yard
- Side yards
- Driveway
- Existing spaces such as spa area, service court
How to take them:
- Shoot from as far back as you can
- Incorporate as much of the garden as possible
- Capture all the angles
Example overview shots below:
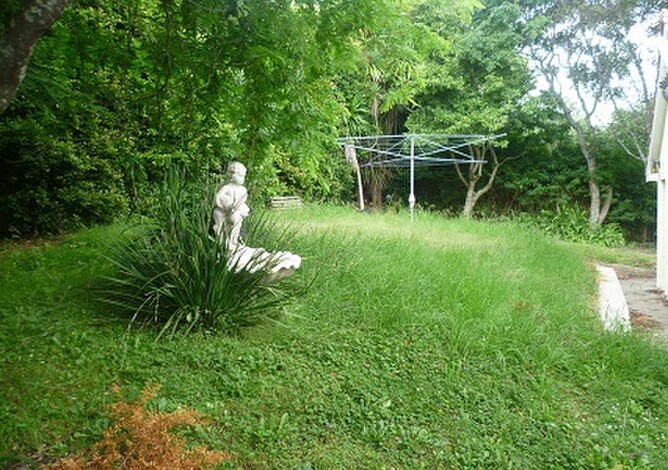
ABOVE: Back garden space from the northern boundary
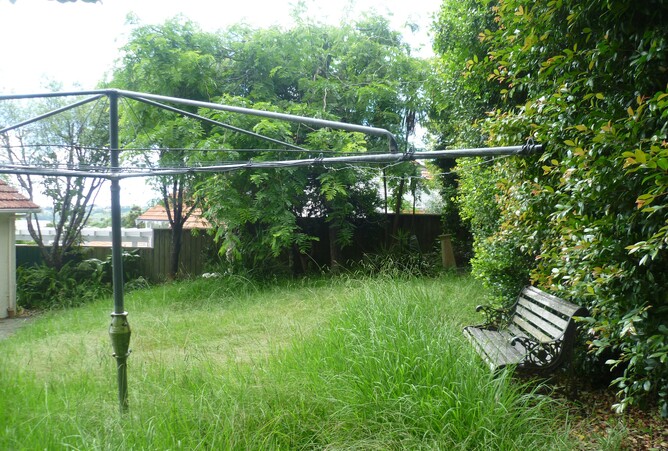
ABOVE: Same garden from the southern boundary
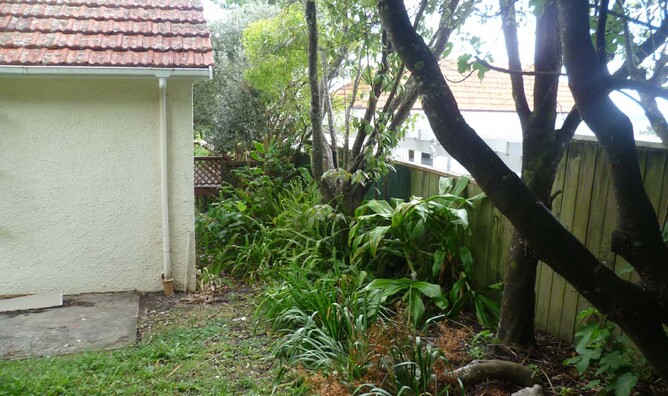
ABOVE: Shows us whats happening around the corner, helping
us to understand flow around the garden
Context images
Context images focus on what’s happening outside the boundaries. Ugly things you want to hide or screen, key areas that need privacy, lovely views you want to keep etc
Key context shots to include:
- Property frontage, also partially showing neighbouring frontages
- Problem areas beyond the boundaries needing screening / privacy solutions
- Lovely views and vistas
How to take them:
- Snap the relevant view line/s out
- Include some of your garden in the shot as well
Example context shots below:
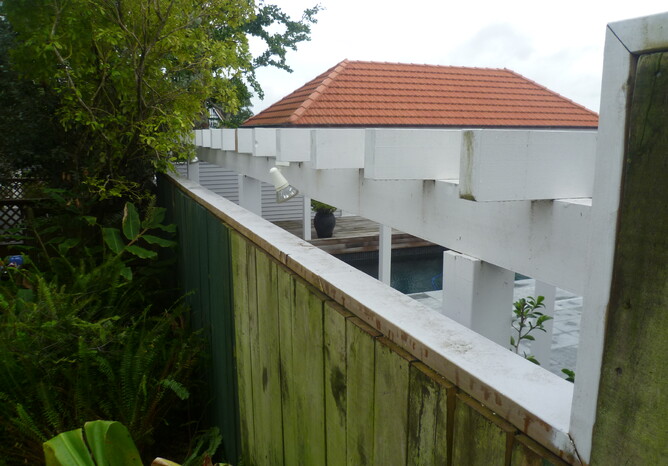
ABOVE: Gives us a sneaky peak over the fence. Pools mean noise and shows us a sound buffer is needed here, along with screen planting to hide the dominant pergola structure.
ABOVE: Here we can see that above the pergola there is a great long view framed by the trees, so we should be retaining the views and screening just the lower area.
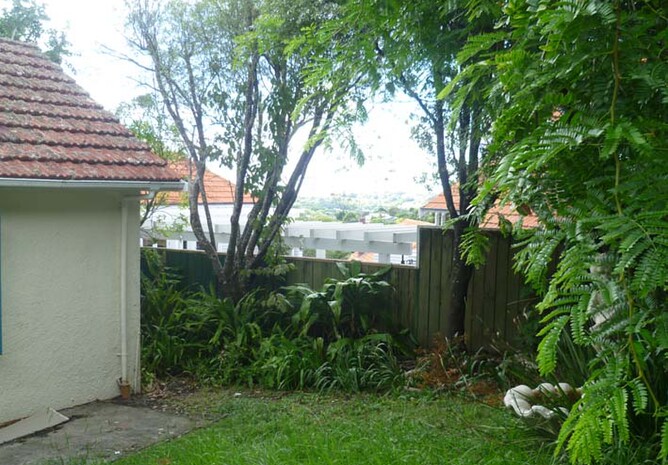
ABOVE: Shows how the tall house next door overs looks the
back garden and highlights the need for strategic privacy screening
ABOVE Highlights the nice trees on the property below our site and shows a gap in planting where the orange roof needs screening but also shows that above the roof, the long view out to big open sky could be kept.
Detail photographs
Detail photographs focus in on smaller details and important items.
Key detail shots to include
- Things to keep / re-home in the design such as sculpture, pots, gates, seating, BBQ
- Important interfaces such as steps between different levels/areas
- Location of services such as cess pits, drains, AC units & meter box
- Changes in height
- Fall hazards
- Materials & colours already in use on site ie bricks, masonry blocks, fencing, paving, concrete
How to take them:
- Include a small amount of the surrounding area to help us locate the item on site
- Include a ruler or tape measure to show important dimensions i.e. changes in height
- Include multiple items in one photo if they are in close proximity i.e. services
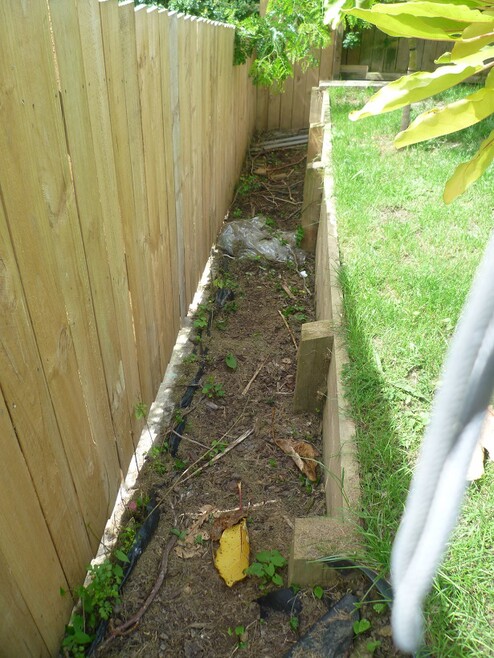
In this detail shot we can lower garden retaining. Important as the change in level at the end of the lawn that would not be visible from distance. but does influences our planting choices.

ABOVE: This is a great detail shot. As well as showing us the existing paving
it also shows the height of the step down from the house to the existing
finished paving level, which influences our choice in new surface materials.
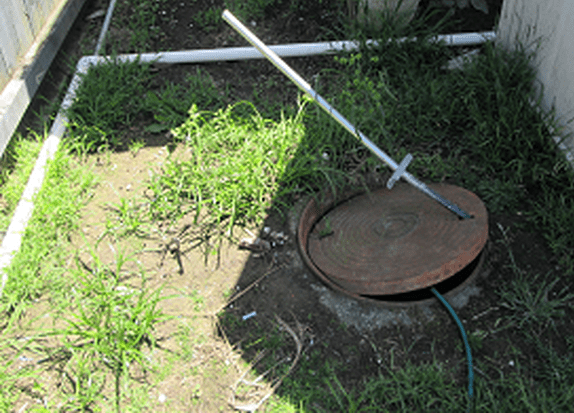
ABOVE: Include photos to show locations of any man holes in your garden
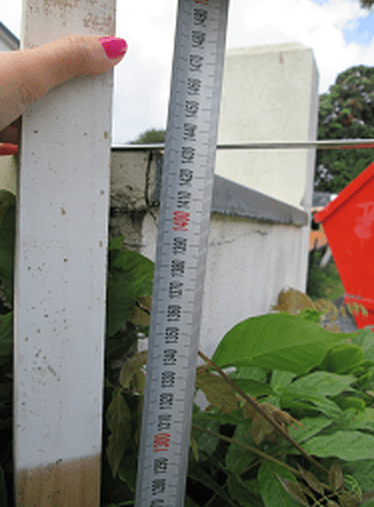
ABOVE: Using a tape measure in detail photos, such as to
show the height of the existing fence on the boundary,
is a great way to easily provide important site information.
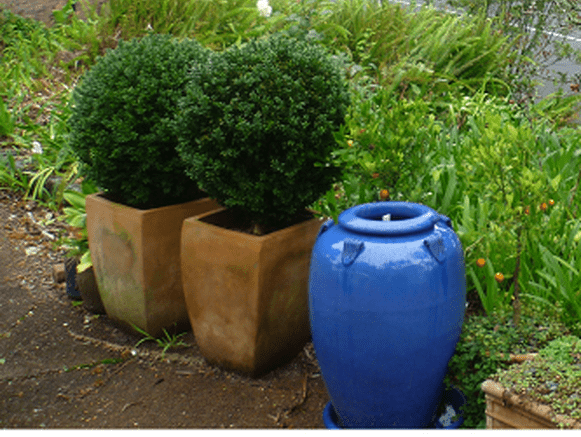
ABOVE: This little detail shot show us some existing treasures we can
reuse in your garden design. These can be things like your current
BBQ or in this instance a favourite garden pot and some botanicals.
Botanicals
The final type of photos are the Botanicals. The health of your plants is a great indicator of growing conditions at your place and while planting will show in the overview and context photos, it can be difficult to identify some plants from a distance. Established plants can also add a lot of value to your property, so remove with caution prior to talking with your designer who will discuss your photos with you during your screen share meeting.
Key things to include:
- Specific plants you want to keep
- Specific plants you want to remove
- Plants you need help identifying
How to take them:
- Include a small amount of the surrounding area to help us locate the plant on site
- Include multiple smaller plants in one photo if they are in close proximity to each other
- For shots to identify plants be sure to include branches as well as foliage (and flowers /seed heads if present) as these can help with plant ID.
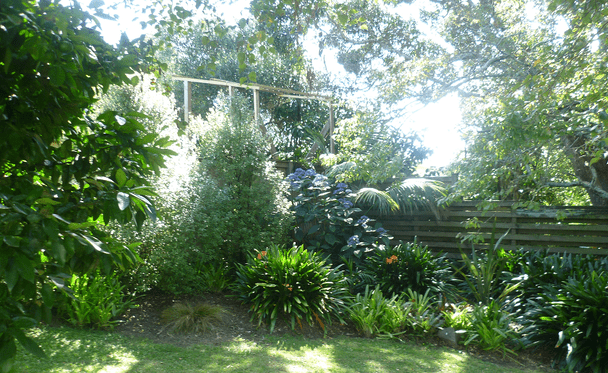
ABOVE: This photo shows the garden bed from a slight distance and shows
the overall garden bed structure, planting style and existing plant range.The
curved shape of the garden bed and the cut lawn edge are also visible.
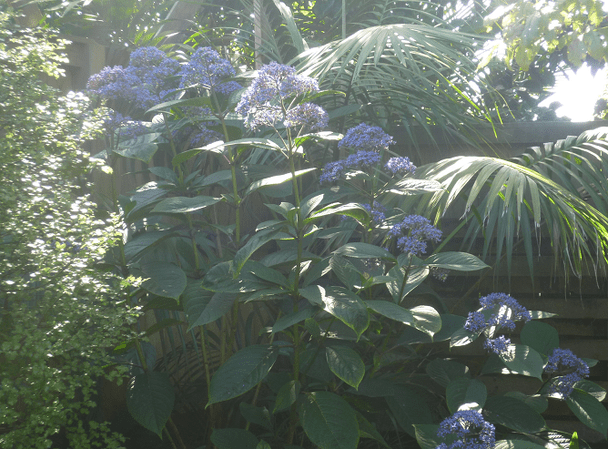
ABOVE: This is the same garden corner however the camera is zoomed in to give
more detail on the existing botanicals, in particular the blue flowering Dichroa shrub.
It's also now possible to identify the leafy shrub as a NZ native Pittosporum.